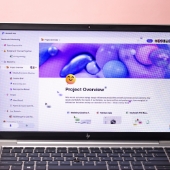
 Microsoft Loop is a productivity tool that lets you collaborate with your team more efficiently. It works seamlessly within Outlook and Teams to keep everyone on the same page. Loop's unique approach to collaboration makes it easy to organize information, discuss ideas, and stay on top of tasks. In this article, we'll explore how to use Microsoft Loop in Outlook and Teams and how it can improve your team's productivity.
Understanding Loop components
A Loop component is a fundamental building block of Microsoft Loop that allows teams to collaborate more efficiently. It provides a centralized location for storing and managing information, making it easy for team members to stay on the same page.
With its flexibility and integration with other Microsoft apps, Loop components are for streamlining team workflows and improving productivity. The types of Loop components you can use in Teams and Outlook are:
- Checklists
- Bulleted lists
- Numbered lists
- Tables
- Paragraphs
- Task list
- Q&A (available only in Outlook)
How to create Loop components
In Teams
- Open Microsoft Teams and navigate to the desired team or channel where you want to create a Loop component.
- Click on the + icon to add a new tab.
- In the search bar, type Loop and select the Loop app from the list of available apps.
- Choose a name for your Loop component and click Save.
- Once your component is created, you can start adding content, such as notes, tasks, and files.
- To add a note, click on the Note icon and start typing. You can use the toolbar options to format your note.
- To add a task, click on the Task icon and enter a task name and description. You can also assign the task to a team member, set a due date, and add any necessary notes or files.
- To add a file, click on the File icon and choose the file you want to upload. You can also add a description and assign it to a category.
In Outlook
- Open Outlook and create a new email.
- In the email toolbar, click on the Loop icon. If you don't see the Loop icon, you may need to enable the Loop app first.
- Choose a name for your Loop component and click Create.
- Once your component is created, you can start adding content, such as notes, tasks, and files.
- To add a note, click on the Note icon and start typing. You can format your text using the toolbar options.
- To add a task, click on the Task icon and enter a task name and description. You can also assign the task to a team member, set a due date, and add any necessary notes or files.
- To add a file, click on the File icon and choose the file you want to upload. You can also add a description and assign it to a category.
Once you have added content to your Loop component, you can share it with your team members. To do this, click on the Share button and choose the members or channels you want to share the component with. You can also set permissions to control who can view and edit the component.
In addition to creating a new Loop component, you can also add an existing Loop component to a Teams channel by clicking on the + icon and selecting Loop from the list of available apps. From there, you can choose an existing Loop component to add to the channel.
If you want to learn more about how to improve workplace collaboration using Microsoft 365, give our experts a call today.

